
LUTs are Dumb
…and I mean that in the nicest, most technically accurate and least disparaging way imaginable!
Don’t get it twisted, though: LUTs are an incredible tool that allows everyone—from hobbyists to amateur filmmakers to Hollywood-level DPs—get the very most out of their footage. The issue is that many folks don’t know how they work or what they do. Most folks will just slap a LUT on their LOG or REC709 footage and call it a day. Understanding what they’re actually doing to your footage, however, will result in being able to deliver higher quality finished products if you’re willing to finesse a little bit.
So, with all of that in mind, in this article we’ll talk about What a LUT is, what they do (and why they’re dumb), and show a few practical examples.
So what is a LUT anyway?
LUT stands for Look Up Table. At its core, it is essentially a massive string of numerical values that transform your footage’s contrast, color, and/or both. A LUT looks at the incoming color and makes adjustments based on the information it contains. If you were to open a LUT in a text editing application, this is what you’d see:

This particular LUT directly from Canon has exactly 274,634 lines of values. That number is not a typo.
At a technical level, it’s remarkably boring. Similar in most ways to the underlying HTML and CSS that make up most websites. However, like when a web browser renders the HTML and CSS together to produce a fully-designed website, what a LUT actually does to footage is something equally impressive…

This is LOG footage straight from a Canon C70.

The same footage with Arch Pro Natural applied.
LUTs have many practical applications: you can use them for monitoring in-camera or on external devices on set, you can use them for transforming every piece of footage to a common color space, or you can add them at the end of your color correction chain or node tree to apply a creative look.
That LUT file I noted above had just over a quarter of a million lines of values, which seems like quite a lot of instructions. However, that number pales in comparison to the amount of color you’re actually capturing even in just 8-bit. For reference:
8-bit capture gets you 16 million colors
10-bit capture gets you 1.07 billion colors
12-bit capture gets you 68.3 billion colors
14-bit footage gets you over 4.3 TRILLION colors
16-bit footage, from say a RED camera, will get you a possible 281 TRILLION colors
Let that sink in for a moment. It’s an almost unfathomable number.
I give this pre-amble to let you know that LUTs are only sampling colors from the incoming footage and making adjustments based on those samples. It would be wholly inefficient to write an instruction set for 16 million individual colors, let alone 281 trillion. You can think of a LUT in the same regard as keyframes for animation: you specify a start and end point and the computer makes its best guess at what should happen to all the values in between.
Types of LUTs Visualized
Above I showed you the equivalent of opening the hood of your car. A LUT is just a series of numbers, yes, but when you visualize those numbers you get to see how remarkable they are. There are two depths for LUTs: 1D and 3D. If I had to make a wild assumption, I’d wager 95% of the LUTs people encounter or are encouraged to buy are of the 3D variety.
1D
1D LUTs adjust images along a single axis. In fact, it looks a LOT like the Curves color correction you’re used to seeing in most video and photo editing platforms. Like so:

The main difference, however, is that 1D LUTs don’t manipulate color, they’re only working with shades of gray. The visual above is tricky because you would think you’re adjusting the red, green, and blue channels but rest assured a 1D LUT has no effect on things like hue, saturation, etc. A 1D LUT is almost exclusively used for gamma transforms. You’d actually be hard pressed to even find a 1D LUT outside of some very specific use cases.
3D
3D LUTs, or for the purposes of this article, LUTs, do indeed transform the red, blue, and green channels of your footage in ways both subtle and overt. You may wonder why LUTs often (but not always) use .cube as their file extension. It’s because a cube is the best way to express them:
Hello Beautiful
All About Shapes and Sizes
LUTs come in a number of sizes or points, but you’ll see three of them most often:
17
33
65
Remember when we talked about how LUTs are sampling your input as opposed to, say, trying to map a billion individual colors? The size of a LUT refers to how many samples are being taken and then modified.
As with all things, there are diminishing returns with more samples—just tell your audio person you recorded a podcast in 192khz and watch the horror creep across their face.
Therefore, it can generally be said that 65-point LUTs produce more accurate results than 17-point LUTs. Again, it’s more about choosing the right tool for the job than always picking the highest setting. When it comes to Arch Pro, only your Natural, Vivid, and Filmic LUTs are 65-point. All other monitoring and creative LUTs are 33-point.
Input and Output
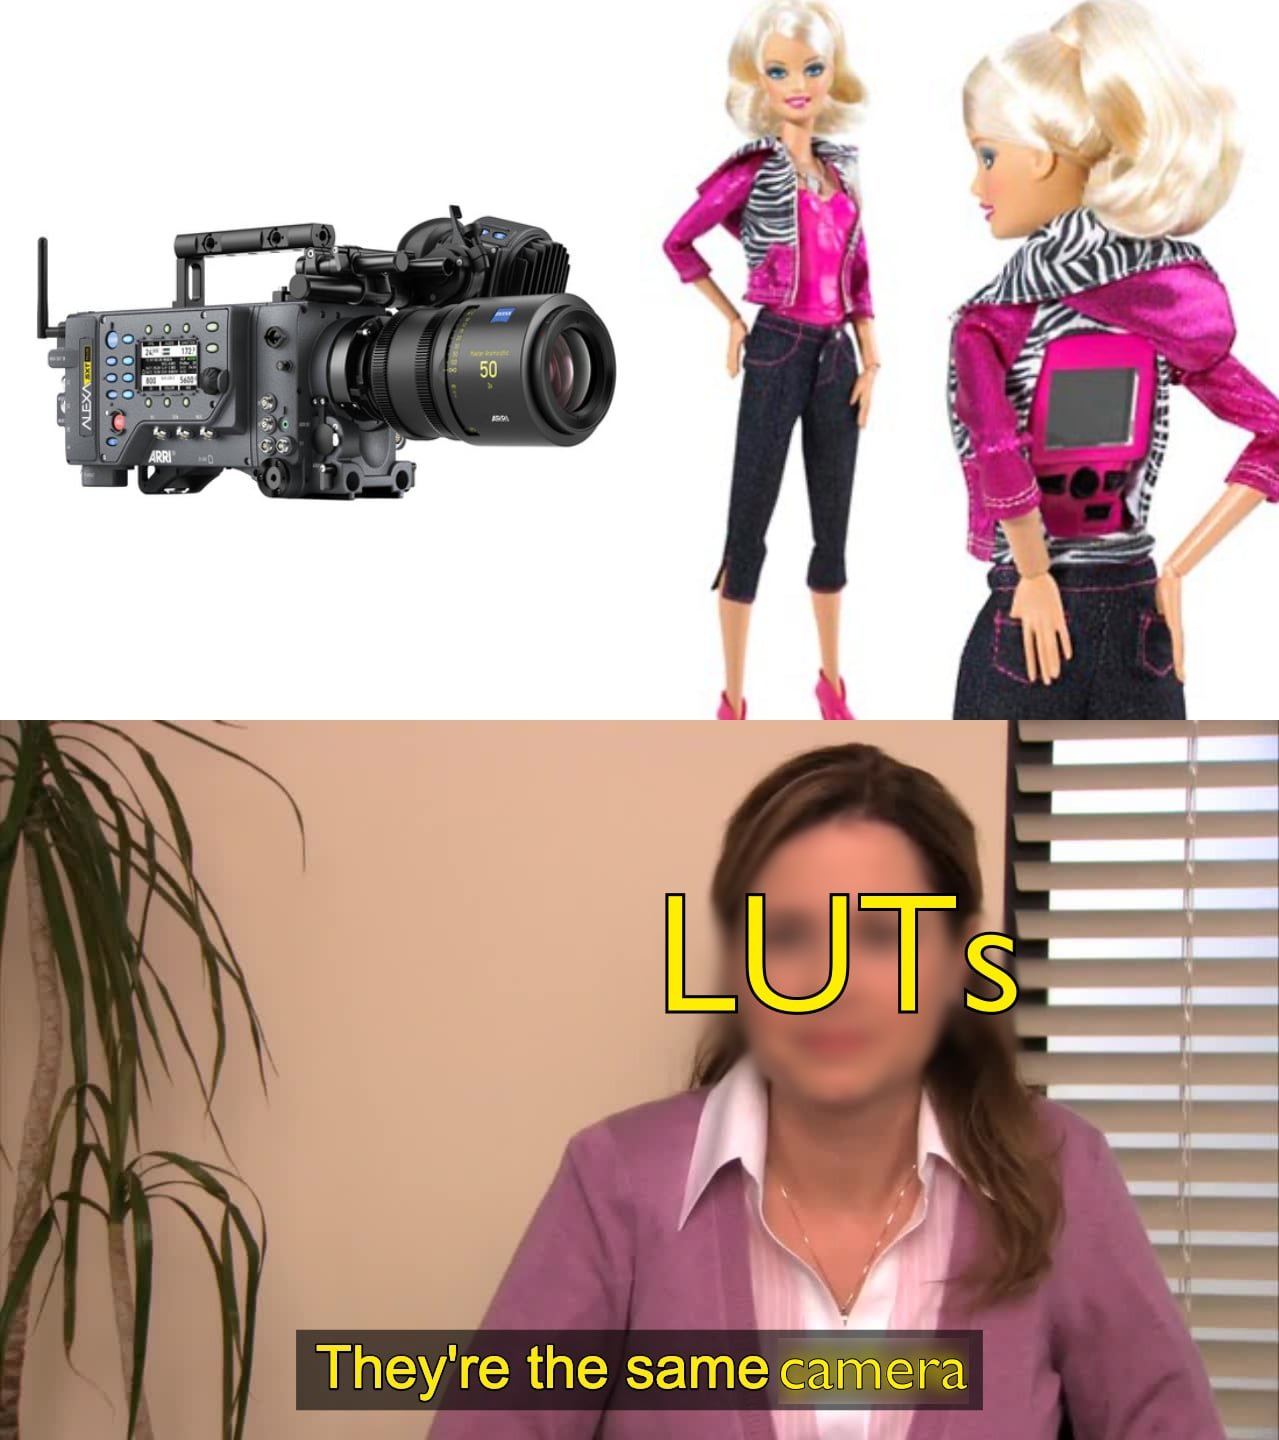
Generally speaking, LUTs have no way to determine what type of footage you’re giving it. To a LUT, footage shot on an ARRI Alexa is identical to footage shot on a Video Girl Barbie.
Some LUTs are built for LOG footage input while others are anticipating a Rec 709 image. You have to hope that the website you’re getting LUTs from has some documentation to speak to what is expected or you’ll be stuck in a trial and error mode.
I know many folks who shoot on Sony a7/FX cameras in SLog3 with SGamut3.Cine, slap an ARRI LogC LUT on their footage, and call it a day. Nine times out of ten, assuming they exposed correctly and the white balance was in order… it looks pretty damn good!
The issue is that if the exposure was a little off, or the white balance was set to—gasp—auto, this could lead to some really big problems. Not the least of which would be crushed shadows or weird skintones.
The same goes for outputs. I’d say 90% of the time LUTs are aiming for a Rec 709 output. You might need that output to be P3 or DCI XYZ for projection, though, which means your work after applying the LUT isn’t done!
For the record: Arch Pro takes multiple flavors of LOG input and gives you a nice, clean Rec 709 output!
You’re exactly my type
For the purposes of my research, I was able to determine that there are three main categories of LUTs: technical, creative, and hybrid. Their names are pretty straightforward to understanding what they do, but for the sake of being thorough:
Technical
A technical LUT helps you move from one established standard into another. You may also hear these referred to as transformation or conversion LUTs. Using one of these Technical LUTs, you could:
Convert your footage from LOG to Linear
Change your footage’s gamut from Rec 709 to DCI XYZ for projection
Convert the white point of an image from 6500K to 6000K
Technical LUTs are all about precision. More often than not, they get your footage looking “normal” but they are not about aesthetics. It’s effectively the equivalent of me converting a Dollar to a Euro when I travel abroad.
Creative
These are the LUTs you’re going to see most of the time across the internet. They are wholly focused on aesthetics, often at the cost of accuracy. Some examples might be:
The classic “Teal and Orange” look from Michael Bay films
A LUT that makes your footage feel autumnal by reducing saturation of the green channel
A simple Black and White or monochrome look
Care of Envato Elements
Sometimes, but rarely, a Creative LUT will actually accept a LOG input and provide a Rec 709 output. Most often though, it’s 709 input/output.
Hybrid
This is where Arch Pro lives! The way I’ve been phrasing this when I let friends give the LUTs a test drive are that they’re Technical LUTs with strong opinions. It will take the LOG profile of your camera as its input, conform it to Rec 709 and then do some targeted hue shifts, saturation boosts, and play around with the highlight rolloff a bit.
One step further: the creative looks of Arch Pro Plus ALSO start with the same same LOG profile input, apply the Arch Pro Natural conform, and then build the look on top of that point and so you and monitor with the Natural LUT and rest easy.
That’s all folks
Phew, I hope that was a relatively easy read and that you learned something or at least something new about LUTs. There are several resources available from trusted sources like Blackmagic Design that will allow you to go deep into the world of LUTs and learn even more.
At the highest level, you’re now aware of what an amazing tool they can be throughout the various stages of production and post-production. Go forth and make your footage shine!